Currently in the GCC we do not have a way to manually trigger a Flow without using the Flow mobile phone app. This idea came to me as an easy way to manually trigger a Flow with a SharePoint column.
Updated 10/19/2020
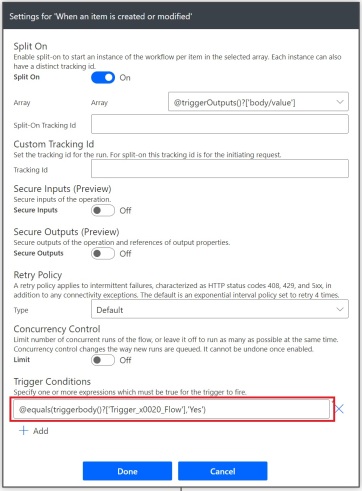
Replace original Condition Statement in blog post below with a ‘Trigger Condition’. This makes sure the Flow only triggers on a change on the column.
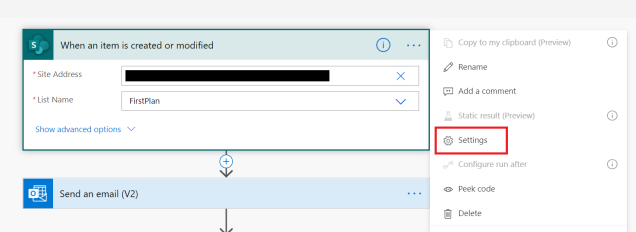
1. Select Settings of the Trigger Function.
2. Screenshot below, Create a Trigger Condition. In this example it would be: @equals(triggerbody()?[‘Trigger_x0020_Flow’],’Yes’)
3. I will be updating with a new blog entry on how to do trigger conditions shortly.
Original Post:
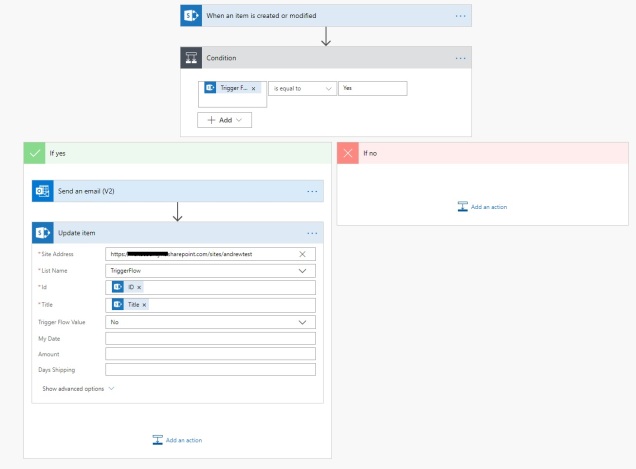
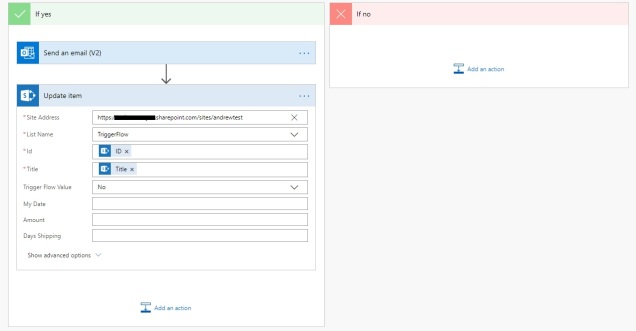
Entire Flow screenshot, with steps below:
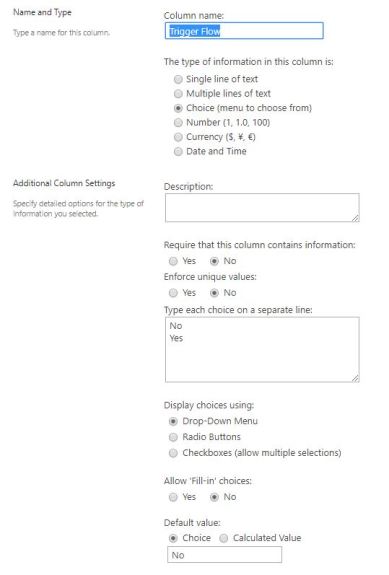
1. Set up your SharePoint list with a choice column (or yes/no column). I used a choice column and defaulted to no.
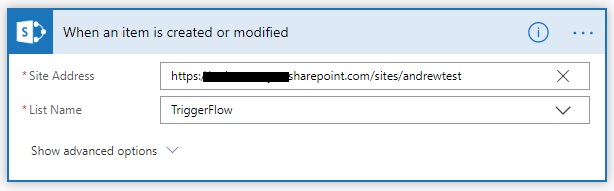
2. Navigate to Power Automate and create a New Automated–from blank Flow. Use a Flow trigger, “When an item is created or modified”. Select your list that should trigger the Flow.
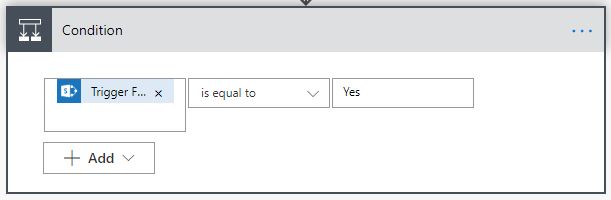
3. Create a condition with the Yes/No choice column and set it to when it “is equal to” Yes. In my case for this example, I originally named the Column “Trigger Flow”.
4. In the condition, create your logic. In my Flow, I just sent an email. After your logic is configured, update the original Item with the original ID and change the Yes/No choice column back to No. This way if someone modifies the item without selecting “Trigger Flow” the Flow will do nothing and each time the “Trigger Flow” column will be set back to “no”. When the “Trigger Flow” column is set as “yes”, the Flow will activate the logic, and send an email.
5. That’s it. Any time someone sets the Trigger Flow column to yes, it will trigger the flow and after the logic is complete, the column will be set back to “No”.
A very simple way to activate a flow based on a SharePoint column. Hopefully this helps someone out in the future!


with this update item, how will I make it to update just the trigger flow option and not the rest of the fields that might have information?
LikeLike
When it updates, you have to update the required fields again with the original information.
It is just replacing the fields with the same information that was already there, and changing the one column “Trigger Flow”.
The only reason that could be an issue that I could forsee is when you go to look at the versioning it will show that the columns were changed. Is that the issue you are trying to resolve?
LikeLike
Could you use this flow to then trigger another workflow? So when the field is ‘yes’ instead of setting it up to send an email as you have – could I set it up to trigger an existing flow? I am trying to have a solution to when a manager says to me ‘I cannot find the approval email for the XX form’ – I want to be able to manually trigger that same flow for them to receive the approval email again?
LikeLike
Hi Kristi,
It looks like this is possible, although I have never created a Flow myself to do this. Maybe this blog could help get you started? https://www.serverless360.com/blog/using-run-child-flow-action-to-call-nested-flows
LikeLike